Sharegate PowerShell – An Easy Way to Create a Starting Folder Structure
Sharegate is an excellent tool that includes features for performing enterprise level content migrations into SharePoint Online and OneDrive for Business. The full version includes a PowerShell interface. This can be a good option for automating your migration process, especially if you have a large number of source and destination locations to map to.
Often when migrating content to a SharePoint team site or a OneDrive site, you may wish to create a starting folder structure in your destination document library before migrating content using Sharegate Powershell. You could do this using several approaches including the SharePoint Patterns and Practices PowerShell cmdlets or the SharePoint Client Side Object Model (CSOM).
But you can create this starting folder structure using just Sharegate PowerShell by taking the following approach:
- Create the reference folder structure you would like to use. (on your local drive or a file share)
- Use the Sharegate Import-Document cmdlet to migrate the folder structure from your reference folder to the destination document library.
- 3.) Use the Import-Document cmdlet again to move the content into a destination folder.(repeat as needed)
If you take this approach you will avoid writing a lot of extra code to get your starting folder structure created. Simpler is better!
Let’s look at an example:
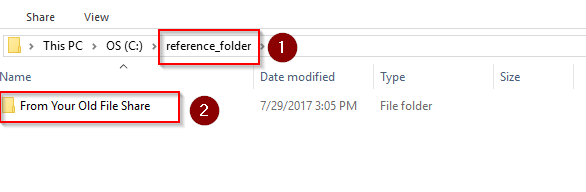
On your local drive create a folder ‘reference_folder’, within that folder create a subfolder ‘From Your Old File Share’. Of course, you can change that name as appropriate to your specific migration.
Then in your migration PowerShell script you would have a statement like this: (code fragment shown, see references for more example PowerShell)
Import-Document -SourceFolder “c:\reference_folder” -DestinationList $dstList;
Next you would follow that up with a second Import-Document line to move the actual content:
Import-Document -SourceFolder \\someshare\somefolder -DestinationList $dstList -DestinationFolder “From Your Old File Share”;
Great we’ve just created a starting folder in our destination document library with just one line of PowerShell.
Now let’s go for bonus points. A nice addition to our script would be to have the folder show up as created and modified by our system account, instead of our personal user account. That would definitely look more professional. We would do that by adding a user mapping to our script. Before the Import-Document statements add a statement like this:
$mappingSettings = Set-UserAndGroupMapping -Source “yourdomain\youraccount” -Destination “SharePoint\SYSTEM”;
Then we can add the $mappingSettings object to our Import-Document statement.
Import-Document -SourceFolder “c:\reference_folder” -DestinationList $dstList -MappingSettings $mappingSettings;
So there we have it. Our new folder will show up in the destination as being created and modified by the system account.
References:
Sharegate PowerShell Import Document cmdlet
Sharegate Walkthrough – Import Files to SharePoint using PowerShell
SharePoint and OneDrive Support for # and %
Control who can create Office 365 Groups
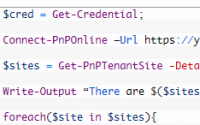
SharePoint Site Auditing with PowerShell
About Author
Frank Stadler
Based out of Dallas, TX area. .NET based web developer LinkedIn Profile Twitter Page