Getting Started with Vue Cli
A good resource for those doing Vue.js development is the Vue CLI development tools. This is installed as an npm package and provides Vue.js project scaffolding and other tools. There is also a web ui for this tool, which we’ll be taking a look at.
One of the advantages of the Vue cli tool is that by clicking a few options, you get a complete simple working project template. It can be difficult to find complete working examples for vue unit tests, routing, etc, so for this tool helps us out there.
In this example we will be creating a starting Vue.js project that includes Mocha unit tests. In a follow-up post I’ll get further into unit testing with Mocha. In this post I will help you create the project with Vue cli and run the starting test.
Open a command prompt. If you don’t have a recent version of node.js as we’ll be using node package manager (npm), you can go to nodejs.org to get that installed.
On your pc open windows explorer and create a test folder for your new project. Something like c:\projects\mochatest\ will work. Open a command prompt and navigate to your folder. Next we’ll install node cli globally with the following command:
npm install -g @vue/cli
The -g is important there, without the global install, Vue cli will not work to well for us. Next we can open the ui version of Vue cli with the following command:
Vue ui
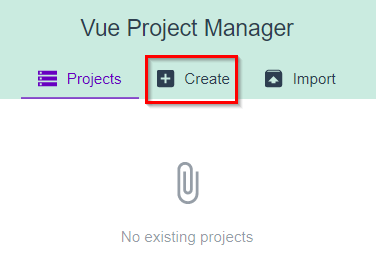
Next you can create a new project by clicking on the create button
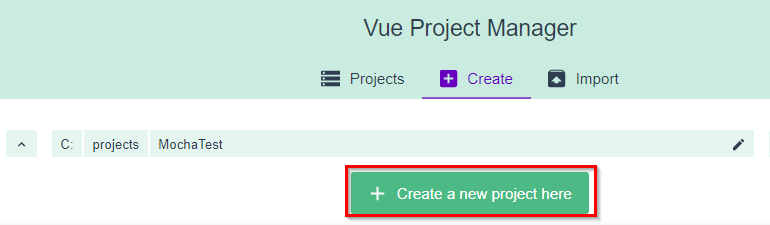
Navigate to the folder you would like to work in (c:\projects\MochaTest) and then click the ‘Crate a new project here’ button at the bottom of the screen.
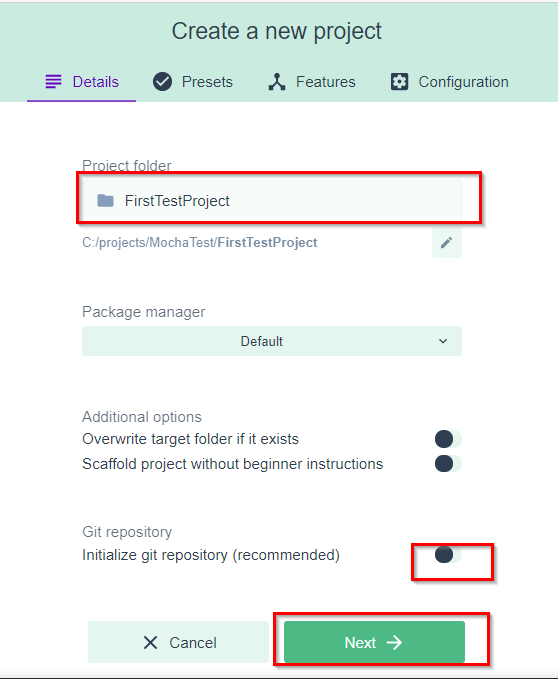
On the next screen, type in a new project folder name. I’m using ‘FirstTestProject’. For this example I’m going to uncheck the ‘Git Repository’ option, then click the ‘Next’ button.
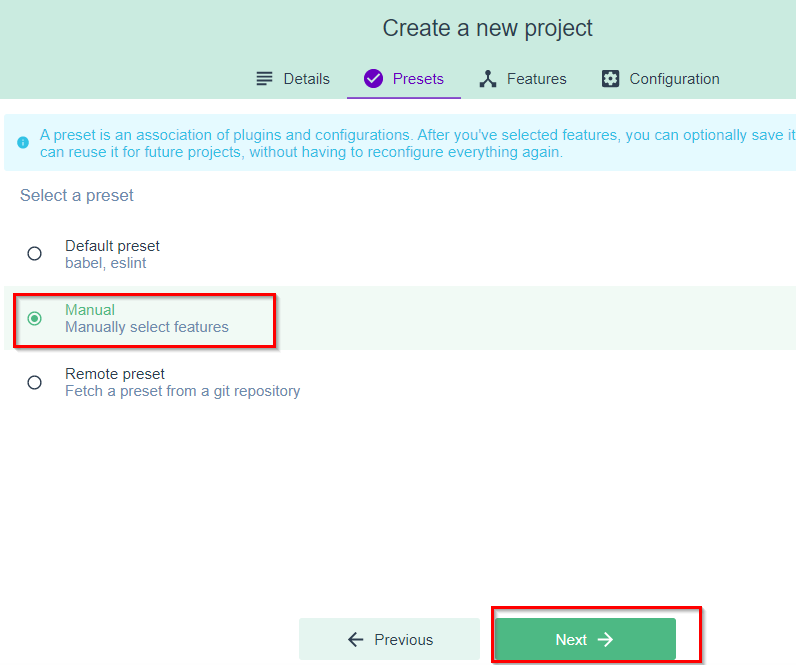
For the Presets screen, I’m going to select the ‘Manual’ option so that I can select the specific features I’d like to include in the test project.
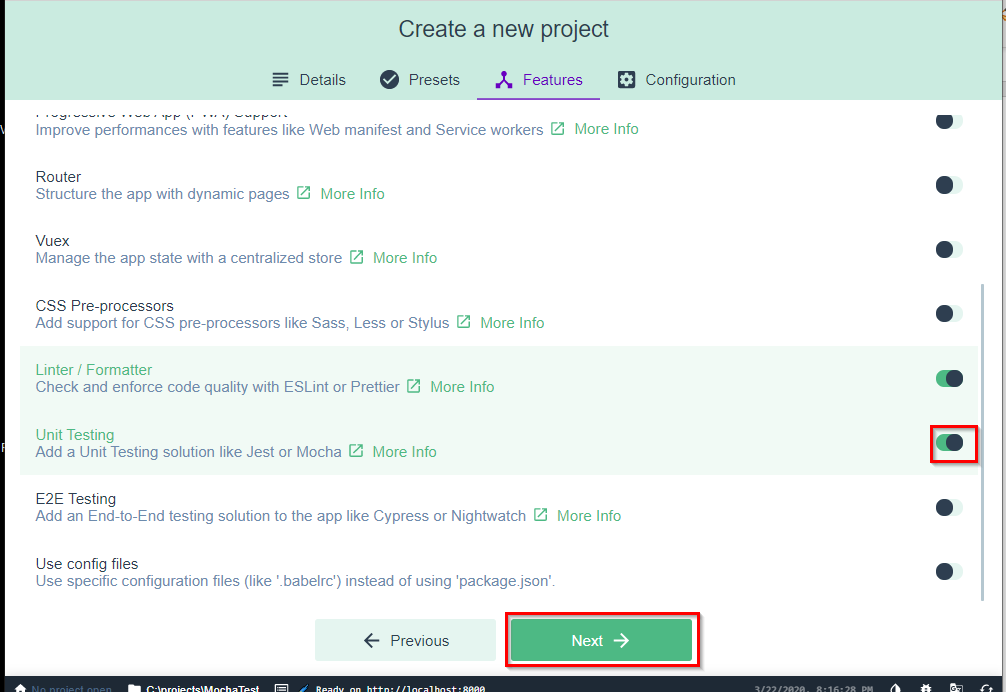
In the feature list, I’m going to keep the defaults and then scroll down and toggle the ‘Unit Testing’ option, then click the ‘Next’ button.
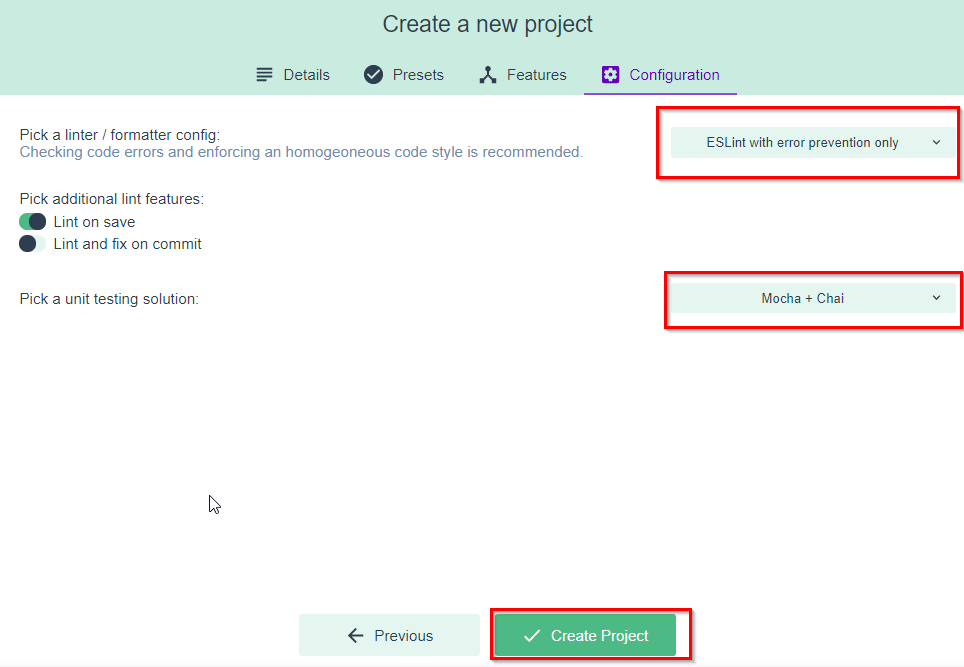
Then on the Configuration tab I’ll select the linting option ‘ESLint with error prevention only’ and the unit testing option ‘Mocha + Chai’. Then click the ‘Create Project’ button.
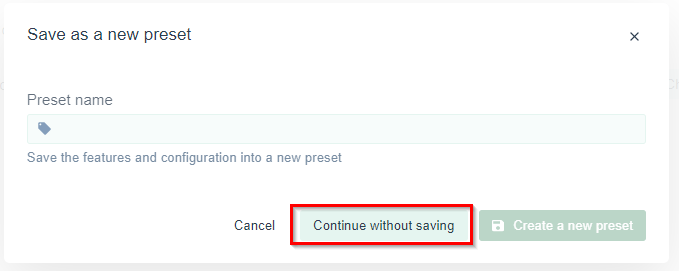
At the prompt I’ll select ‘Continue without saving’. Saving the preset with the name allows you to rapidly create new projects with that preset.
The create process will likely take a few minutes, and when you’re done you will have a small working project with the options we configured.
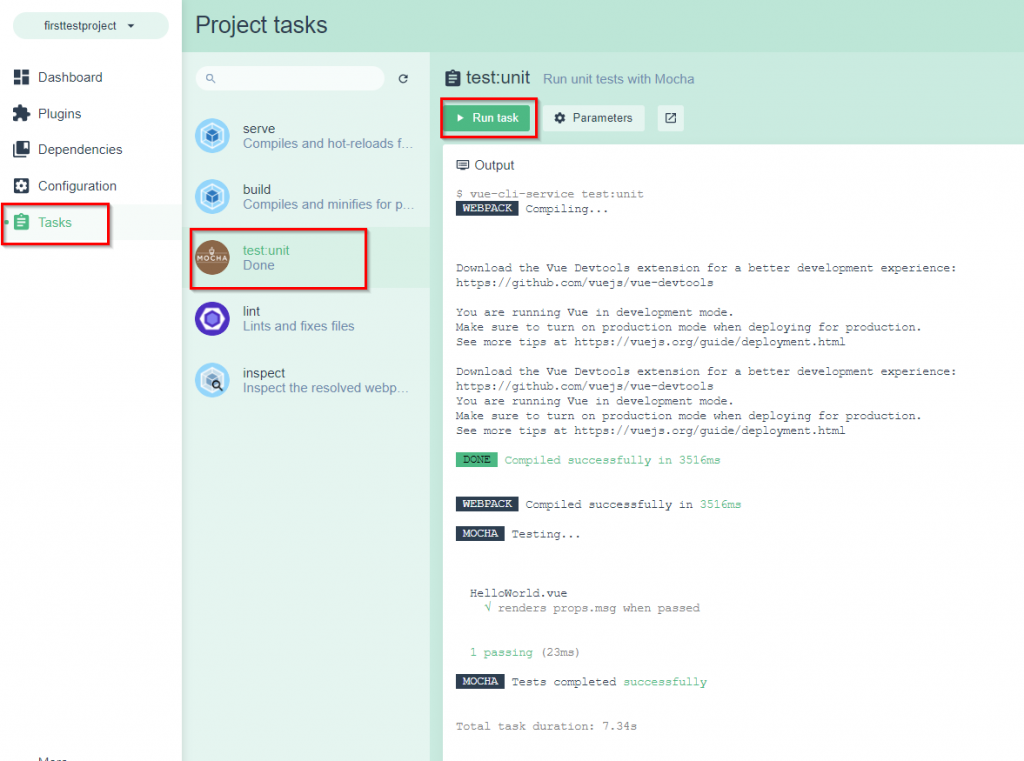
Finally on the project dashboard you can click ‘tasks’, then ‘test:unit’, then click the ‘run task’ button. The starting Hello World unit test will run and we’ll see the mocha output.
And that completes the walkthrough of the process of creating a sample vue.js project that includes Mocha unit tests using Vue cli.
References:
Vue.js conditional display v-if and v-show
C# Simplify Validation With Guard Clauses

Project Blazor – Run C#/Razor in the Browser
About Author
Frank Stadler
Based out of Dallas, TX area. .NET based web developer LinkedIn Profile Twitter Page